项目部署上线指南
准备上线
上线前的检查工作。
python manage.py check --deploy
将DEBUG设置为False并配置ALLOWED_HOSTS。
DEBUG = FalseALLOWED_HOSTS = ['*']
安全相关的配置。
# 保持HTTPS连接的时间SECURE_HSTS_SECONDS = 3600SECURE_HSTS_INCLUDE_SUBDOMAINS = TrueSECURE_HSTS_PRELOAD = True# 自动重定向到安全连接SECURE_SSL_REDIRECT = True# 避免浏览器自作聪明推断内容类型SECURE_CONTENT_TYPE_NOSNIFF = True# 避免跨站脚本攻击SECURE_BROWSER_XSS_FILTER = True# COOKIE只能通过HTTPS进行传输SESSION_COOKIE_SECURE = TrueCSRF_COOKIE_SECURE = True# 防止点击劫持攻击手段 - 修改HTTP协议响应头# 当前网站是不允许使用<iframe>标签进行加载的X_FRAME_OPTIONS = 'DENY'
敏感信息放到环境变量或文件中。
SECRET_KEY = os.environ['SECRET_KEY']DB_USER = os.environ['DB_USER']DB_PASS = os.environ['DB_PASS']REDIS_AUTH = os.environ['REDIS_AUTH']
更新服务器Python环境到3.x
说明:如果需要清除之前的安装,就删除对应的文件和文件夹即可
安装底层依赖库。
yum -y install zlib-devel bzip2-devel openssl-devel ncurses-devel sqlite-devel readline-devel tk-devel gdbm-devel libdb4-devel libpcap-devel xz-devel libffi-devel
下载Python源代码。
wget https://www.python.org/ftp/python/3.7.1/Python-3.7.1.tar.xz
解压缩和解归档。
xz -d Python-3.7.1.tar.xztar -xvf Python-3.7.1.tar
执行配置生成Makefile(构建文件)。
cd Python-3.7.1./configure --prefix=/usr/local/python37 --enable-optimizations
构建和安装。
make && make install
配置PATH环境变量(用户或系统环境变量)并激活。
vim ~/.bash_profilevim /etc/profile
... 此处省略上面的代码...export PATH=$PATH:/usr/local/python37/bin... 此处省略下面的代码...
source ~/.bash_profilesource /etc/profile
注册软链接(符号链接)- 这一步不是必须的,但通常会比较有用。
ln -s /usr/local/python37/bin/python3 /usr/bin/python3
测试Python环境是否更新成功(安装Python 3一定不能破坏原来的Python 2)。
python3 --versionpython --version
项目目录结构
假设项目文件夹为project,下面的五个子目录分别是:code、conf、logs、stat和venv分别用来保存项目的代码、配置文件、日志文件、静态资源和虚拟环境。其中,conf目录下的子目录cert中保存了配置HTTPS需要使用的证书和密钥;code目录下的项目代码可以通过版本控制工具从代码仓库中检出;虚拟环境可以通过工具(如:venv、virtualenv、pyenv等)进行创建。
project├── code│ └── fangtx│ ├── api│ ├── common│ ├── fangtx│ ├── forum│ ├── rent│ ├── user│ ├── manage.py│ ├── README.md│ ├── static│ └── templates├── conf│ ├── cert│ │ ├── 214915882850706.key│ │ └── 214915882850706.pem│ ├── nginx.conf│ └── uwsgi.ini├── logs│ ├── access.log│ ├── error.log│ └── uwsgi.log├── stat│ └── css│ └── images│ └── js└── venv├── bin│ ├── activate│ ├── activate.csh│ ├── activate.fish│ ├── celery│ ├── celerybeat│ ├── celeryd│ ├── celeryd-multi│ ├── coverage│ ├── coverage3│ ├── coverage-3.7│ ├── django-admin│ ├── django-admin.py│ ├── easy_install│ ├── easy_install-3.7│ ├── pip│ ├── pip3│ ├── pip3.7│ ├── __pycache__│ ├── pyrsa-decrypt│ ├── pyrsa-decrypt-bigfile│ ├── pyrsa-encrypt│ ├── pyrsa-encrypt-bigfile│ ├── pyrsa-keygen│ ├── pyrsa-priv2pub│ ├── pyrsa-sign│ ├── pyrsa-verify│ ├── python -> python3│ ├── python3 -> /usr/bin/python3│ └── uwsgi├── include├── lib│ └── python3.7├── lib64 -> lib├── pip-selfcheck.json└── pyvenv.cfg
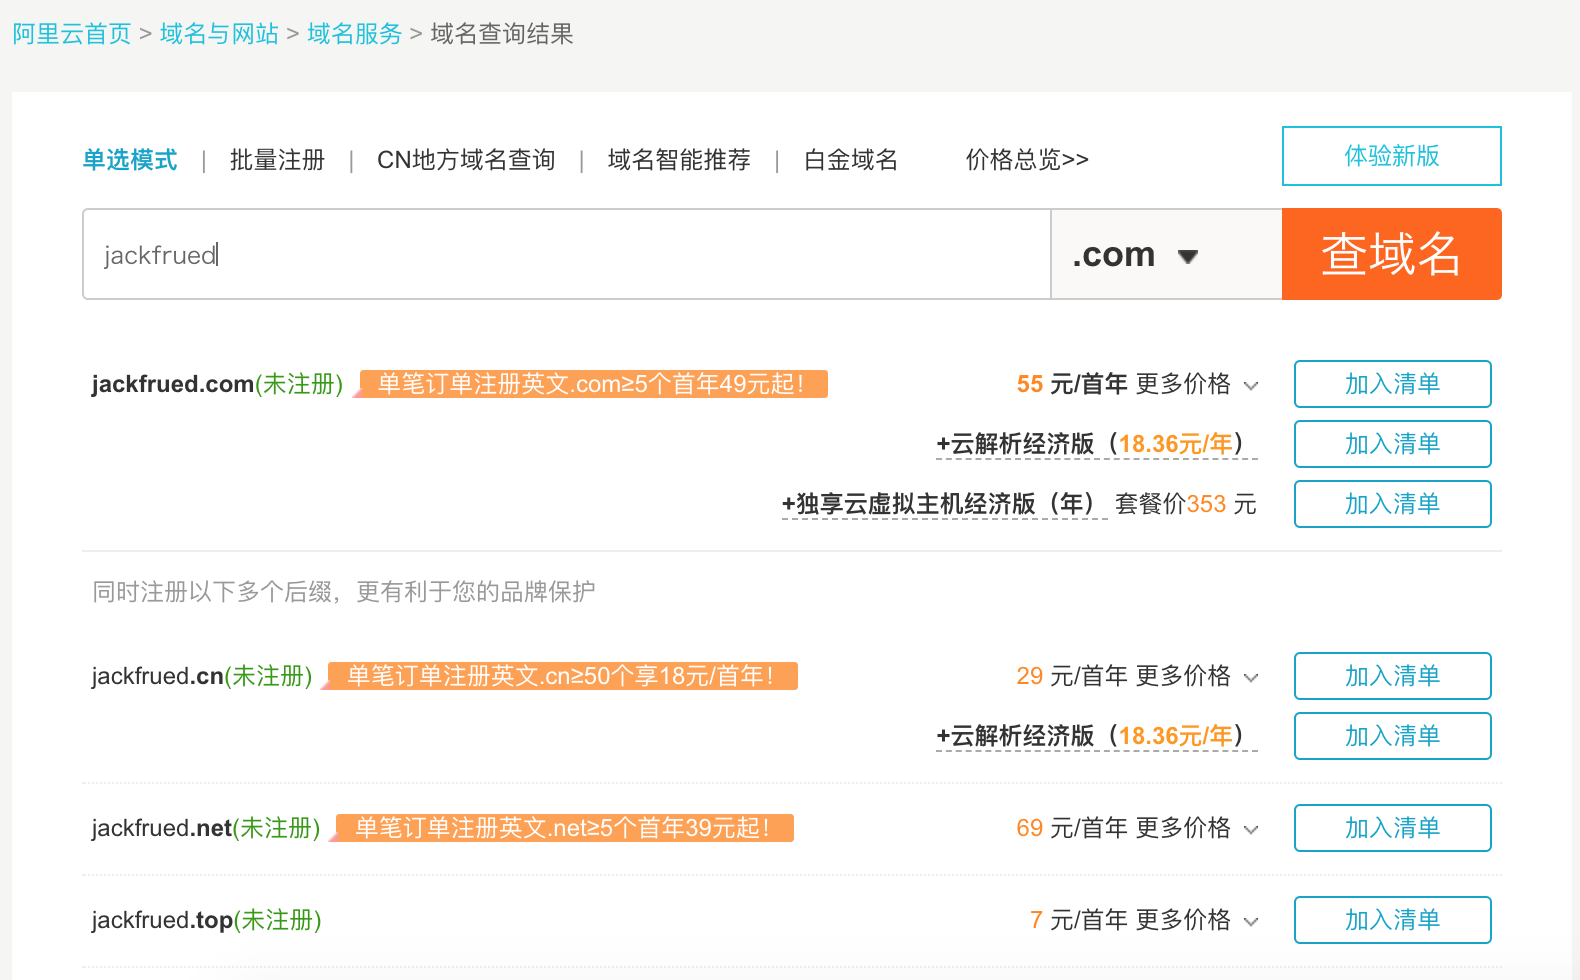
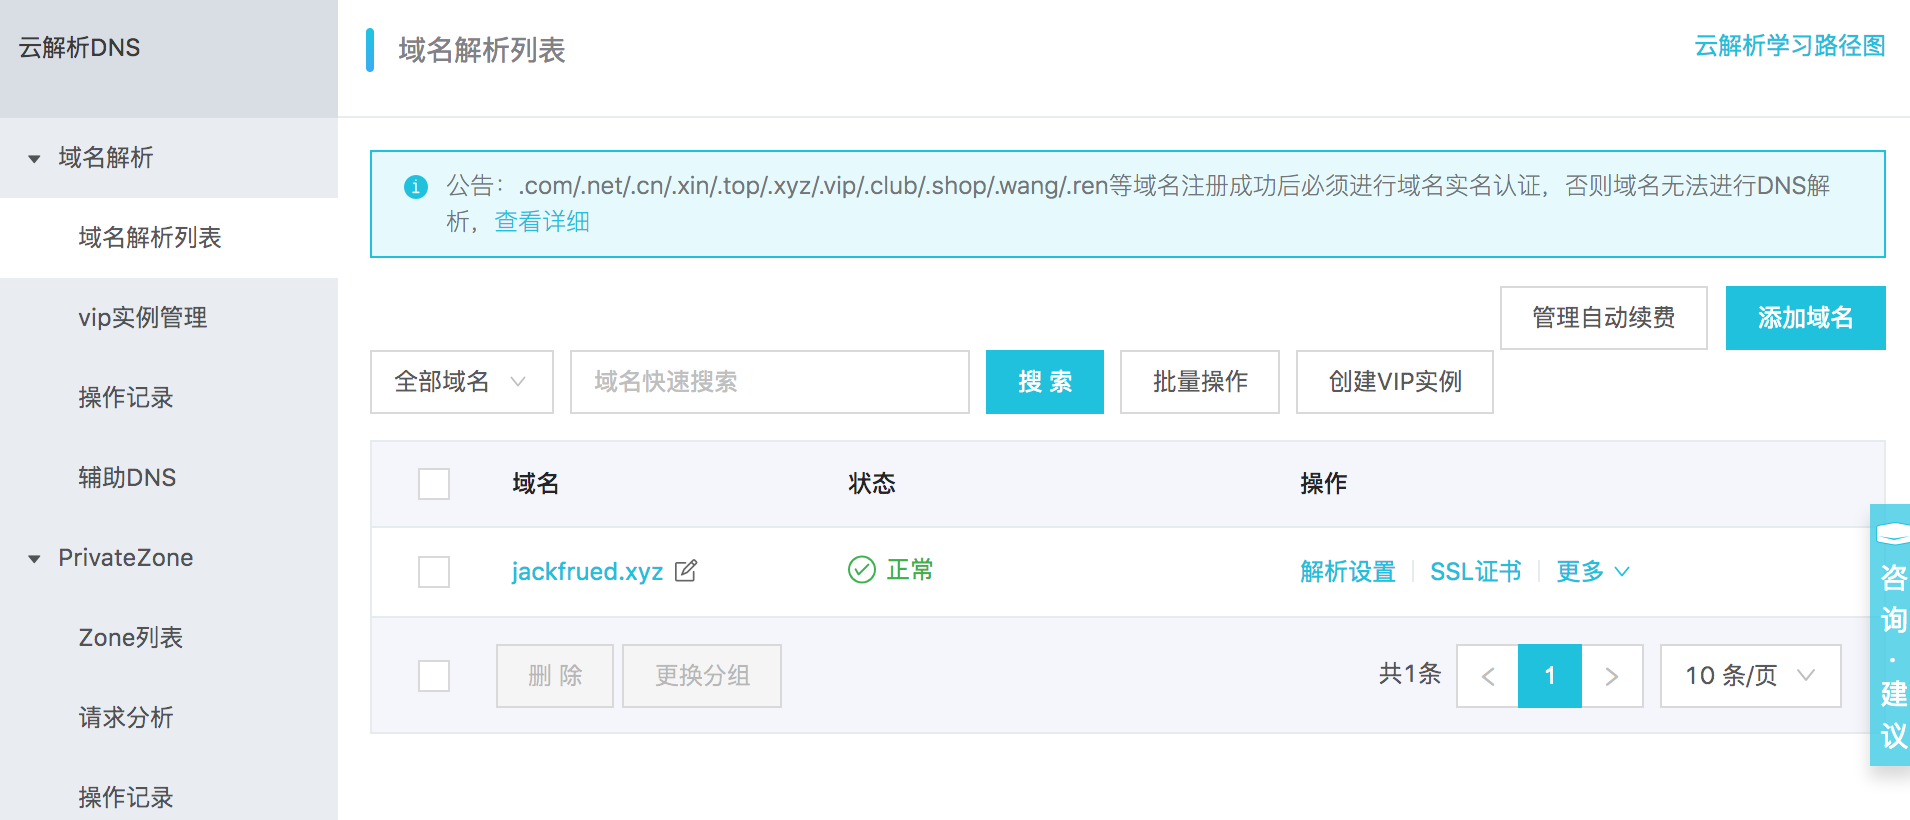
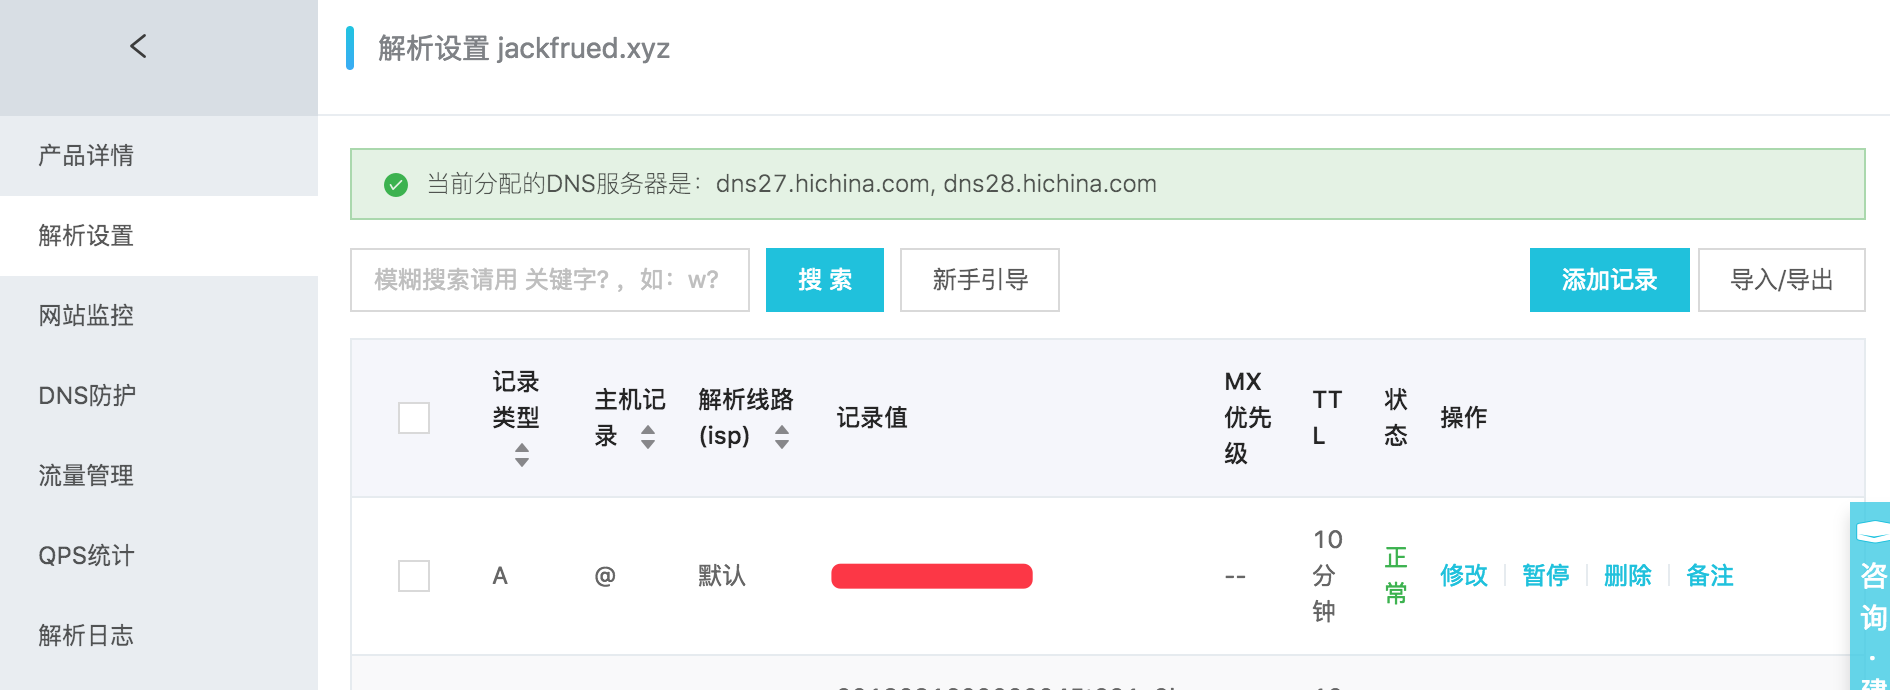
下面以阿里云为例,简单说明如何为项目注册域名、解析域名以及购买权威机构颁发的证书。


可以使用类似于sftp的工具将证书上传到conf/cert目录,然后使用git克隆项目代码到code目录。
cd codegit clone <url>
回到项目目录,创建并激活虚拟环境。
python3 -m venv venvsource venv/bin/activate
重建项目依赖项。
pip install -r code/teamproject/requirements.txt
uWSGI的配置
安装uWSGI。
pip install uwsgi
修改uWSGI的配置文件(
/root/project/conf/uwsgi.ini)。[uwsgi]# 配置前导路径base=/root/project# 配置项目名称name=teamproject# 守护进程master=true# 进程个数processes=4# 虚拟环境pythonhome=%(base)/venv# 项目地址chdir=%(base)/code/%(name)# 指定python解释器pythonpath=%(pythonhome)/bin/python# 指定uwsgi文件module=%(name).wsgi# 通信的地址和端口(自己服务器的IP地址和端口)socket=172.18.61.250:8000# 日志文件地址logto=%(base)/logs/uwsgi.log
说明:可以先将“通信的地址和端口”项等号前面改为http来进行测试,如果没有问题再改回 成socket,然后通过Nginx来实现项目的“动静分离”(静态资源交给Nginx处理,动态内容交给 uWSGI处理)。按照下面的方式可以启动uWSGI服务器。
启动服务器。
uwsgi --ini conf/uwsgi.ini
Nginx的配置
安装Nginx。
yum -y install nginx
修改全局配置文件(
/etc/nginx/nginx.conf)。# 配置用户user root;# 工作进程数(建议跟CPU的核数量一致)worker_processes auto;# 错误日志error_log /var/log/nginx/error.log;# 进程文件pid /run/nginx.pid;# 包含其他的配置include /usr/share/nginx/modules/*.conf;# 工作模式(多路IO复用方式)和连接上限events {use epoll;worker_connections 1024;}# HTTP服务器相关配置http {# 日志格式log_format main '$remote_addr - $remote_user [$time_local] "$request" ''$status $body_bytes_sent "$http_referer" ''"$http_user_agent" "$http_x_forwarded_for"';# 访问日志access_log /var/log/nginx/access.log main;# 开启高效文件传输模式sendfile on;# 用sendfile传输文件时有利于改善性能tcp_nopush on;# 禁用Nagle来解决交互性问题tcp_nodelay on;# 客户端保持连接时间keepalive_timeout 30;types_hash_max_size 2048;# 包含MIME类型的配置include /etc/nginx/mime.types;# 默认使用二进制流格式default_type application/octet-stream;# 包含其他配置文件include /etc/nginx/conf.d/*.conf;# 包含项目的Nginx配置文件include /root/project/conf/*.conf;}
编辑局部配置文件(
/root/project/conf/nginx.conf)。server {listen 80;server_name _;access_log /root/project/logs/access.log;error_log /root/project/logs/error.log;location / {include uwsgi_params;uwsgi_pass 172.18.61.250:8000;}location /static/ {alias /root/project/stat/;expires 30d;}}server {listen 443;server_name _;ssl on;access_log /root/project/logs/access.log;error_log /root/project/logs/error.log;ssl_certificate /root/project/conf/cert/214915882850706.pem;ssl_certificate_key /root/project/conf/cert/214915882850706.key;ssl_session_timeout 5m;ssl_ciphers ECDHE-RSA-AES128-GCM-SHA256:ECDHE:ECDH:AES:HIGH:!NULL:!aNULL:!MD5:!ADH:!RC4;ssl_protocols TLSv1 TLSv1.1 TLSv1.2;ssl_prefer_server_ciphers on;location / {include uwsgi_params;uwsgi_pass 172.18.61.250:8000;}location /static/ {alias /root/project/static/;expires 30d;}}
到此为止,我们可以启动Nginx来访问我们的应用程序,HTTP和HTTPS都是没有问题的,如果Nginx已经运行,在修改配置文件后,我们可以用下面的命令重新启动Nginx。
重启Nginx服务器。
nginx -s reload
或
systemctl restart nginx
说明:可以对Django项目使用
python manage.py collectstatic命令将静态资源收集到指定目录下,要做到这点只需要在项目的配置文件settings.py中添加STATIC_ROOT配置即可。
负载均衡配置
下面的配置中我们使用Nginx实现负载均衡,为另外的三个Nginx服务器(通过Docker创建)提供反向代理服务。
docker run -d -p 801:80 --name nginx1 nginx:latestdocker run -d -p 802:80 --name nginx2 nginx:latestdocker run -d -p 803:80 --name nginx3 nginx:latest
user root;worker_processes auto;error_log /var/log/nginx/error.log;pid /run/nginx.pid;include /usr/share/nginx/modules/*.conf;events {worker_connections 1024;}# 为HTTP服务配置负载均衡http {upstream fangtx {server 172.18.61.250:801 weight=4;server 172.18.61.250:802 weight=2;server 172.18.61.250:803 weight=2;}server {listen 80 default_server;listen [::]:80 default_server;listen 443 ssl;listen [::]:443 ssl;ssl on;access_log /root/project/logs/access.log;error_log /root/project/logs/error.log;ssl_certificate /root/project/conf/cert/214915882850706.pem;ssl_certificate_key /root/project/conf/cert/214915882850706.key;ssl_session_timeout 5m;ssl_ciphers ECDHE-RSA-AES128-GCM-SHA256:ECDHE:ECDH:AES:HIGH:!NULL:!aNULL:!MD5:!ADH:!RC4;ssl_protocols TLSv1 TLSv1.1 TLSv1.2;ssl_prefer_server_ciphers on;location / {proxy_set_header Host $host;proxy_set_header X-Real-IP $remote_addr;proxy_set_header X-Forwarded-For $proxy_add_x_forwarded_for;proxy_buffering off;proxy_pass http://fangtx;}}}
说明:Nginx在配置负载均衡时,默认使用WRR(加权轮询算法),除此之外还支持ip_hash、fair(需要安装upstream_fair模块)和url_hash算法。此外,在配置upstream模块时可以指定服务器的状态值,包括:backup(备份机器,其他服务器不可用时才将请求分配到该机器)、down、fail_timeout(请求失败达到max_fails后的暂停服务时间)、max_fails(允许请求失败的次数)和weight(轮询的权重)。
Keepalived
当使用Nginx进行负载均衡配置时,要考虑负载均衡服务器宕机的情况。为此可以使用Keepalived来实现负载均衡主机和备机的热切换,从而保证系统的高可用性。Keepalived的配置还是比较复杂,通常由专门做运维的人进行配置,一个基本的配置可以参照《Keepalived的配置和使用》。
MySQL主从复制
下面还是基于Docker来演示如何配置MySQL主从复制。我们事先准备好MySQL的配置文件以及保存MySQL数据和运行日志的目录,然后通过Docker的数据卷映射来指定容器的配置、数据和日志文件的位置。
root└── mysql├── master│ ├── conf| └── data└── slave-1| ├── conf| └── data└── slave-2| ├── conf| └── data└── slave-3├── conf└── data
MySQL的配置文件(master和slave的配置文件需要不同的server-id)。
[mysqld]pid-file=/var/run/mysqld/mysqld.pidsocket=/var/run/mysqld/mysqld.sockdatadir=/var/lib/mysqllog-error=/var/log/mysql/error.logserver-id=1log-bin=/var/log/mysql/mysql-bin.logexpire_logs_days=30max_binlog_size=256Msymbolic-links=0# slow_query_log=ON# slow_query_log_file=/var/log/mysql/slow.log# long_query_time=1
创建和配置master。
docker run -d -p 3306:3306 --name mysql-master \-v /root/mysql/master/conf:/etc/mysql/mysql.conf.d \-v /root/mysql/master/data:/var/lib/mysql \-e MYSQL_ROOT_PASSWORD=123456 mysql:5.7docker exec -it mysql-master /bin/bash
mysql -u root -pEnter password:Welcome to the MySQL monitor. Commands end with ; or \g.Your MySQL connection id is 1Server version: 5.7.23-log MySQL Community Server (GPL)Copyright (c) 2000, 2018, Oracle and/or its affiliates. All rights reserved.Oracle is a registered trademark of Oracle Corporation and/or itsaffiliates. Other names may be trademarks of their respectiveowners.Type 'help;' or '\h' for help. Type '\c' to clear the current input statement.mysql> grant replication slave on *.* to 'slave'@'%' identified by 'iamslave';Query OK, 0 rows affected, 1 warning (0.00 sec)mysql> flush privileges;Query OK, 0 rows affected (0.00 sec)mysql> show master status;+------------------+----------+--------------+------------------+-------------------+| File | Position | Binlog_Do_DB | Binlog_Ignore_DB | Executed_Gtid_Set |+------------------+----------+--------------+------------------+-------------------+| mysql-bin.000003 | 590 | | | |+------------------+----------+--------------+------------------+-------------------+1 row in set (0.00 sec)mysql> quitByeexit
上面创建Docker容器时使用的
-v参数(--volume)表示映射数据卷,冒号前是宿主机的目录,冒号后是容器中的目录,这样相当于将宿主机中的目录挂载到了容器中。创建和配置slave。
docker run -d -p 3308:3306 --name mysql-slave-1 \-v /root/mysql/slave-1/conf:/etc/mysql/mysql.conf.d \-v /root/mysql/slave-1/data:/var/lib/mysql \-e MYSQL_ROOT_PASSWORD=123456 \--link mysql-master:mysql-master mysql:5.7docker run -d -p 3309:3306 --name mysql-slave-2 \-v /root/mysql/slave-2/conf:/etc/mysql/mysql.conf.d \-v /root/mysql/slave-2/data:/var/lib/mysql \-e MYSQL_ROOT_PASSWORD=123456 \--link mysql-master:mysql-master mysql:5.7docker run -d -p 3310:3306 --name mysql-slave-3 \-v /root/mysql/slave-3/conf:/etc/mysql/mysql.conf.d \-v /root/mysql/slave-3/data:/var/lib/mysql \-e MYSQL_ROOT_PASSWORD=123456 \--link mysql-master:mysql-master mysql:5.7docker exec -it mysql-slave-1 /bin/bash
mysql -u root -pEnter password:Welcome to the MySQL monitor. Commands end with ; or \g.Your MySQL connection id is 2Server version: 5.7.23-log MySQL Community Server (GPL)Copyright (c) 2000, 2018, Oracle and/or its affiliates. All rights reserved.Oracle is a registered trademark of Oracle Corporation and/or itsaffiliates. Other names may be trademarks of their respectiveowners.Type 'help;' or '\h' for help. Type '\c' to clear the current input statement.mysql> reset slave;Query OK, 0 rows affected (0.02 sec)mysql> change master to master_host='mysql-master', master_user='slave', master_password='iamslave', master_log_file='mysql-bin.000003', master_log_pos=590;Query OK, 0 rows affected, 2 warnings (0.03 sec)mysql> start slave;Query OK, 0 rows affected (0.01 sec)mysql> show slave status\G*************************** 1. row ***************************Slave_IO_State: Waiting for master to send eventMaster_Host: mysql57Master_User: slaveMaster_Port: 3306Connect_Retry: 60Master_Log_File: mysql-bin.000001Read_Master_Log_Pos: 590Relay_Log_File: f352f05eb9d0-relay-bin.000002Relay_Log_Pos: 320Relay_Master_Log_File: mysql-bin.000001Slave_IO_Running: YesSlave_SQL_Running: YesReplicate_Do_DB:Replicate_Ignore_DB:Replicate_Do_Table:Replicate_Ignore_Table:Replicate_Wild_Do_Table:Replicate_Wild_Ignore_Table:Last_Errno: 0Last_Error:Skip_Counter: 0Exec_Master_Log_Pos: 590Relay_Log_Space: 534Until_Condition: NoneUntil_Log_File:Until_Log_Pos: 0Master_SSL_Allowed: NoMaster_SSL_CA_File:Master_SSL_CA_Path:Master_SSL_Cert:Master_SSL_Cipher:Master_SSL_Key:Seconds_Behind_Master: 0Master_SSL_Verify_Server_Cert: NoLast_IO_Errno: 0Last_IO_Error:Last_SQL_Errno: 0Last_SQL_Error:Replicate_Ignore_Server_Ids:Master_Server_Id: 1Master_UUID: 30c38043-ada1-11e8-8fa1-0242ac110002Master_Info_File: /var/lib/mysql/master.infoSQL_Delay: 0SQL_Remaining_Delay: NULLSlave_SQL_Running_State: Slave has read all relay log; waiting for more updatesMaster_Retry_Count: 86400Master_Bind:Last_IO_Error_Timestamp:Last_SQL_Error_Timestamp:Master_SSL_Crl:Master_SSL_Crlpath:Retrieved_Gtid_Set:Executed_Gtid_Set:Auto_Position: 0Replicate_Rewrite_DB:Channel_Name:Master_TLS_Version:1 row in set (0.00 sec)mysql> quitByeexit
接下来可以如法炮制配置出slave2和slave3,这样就可以搭建起一个“一主带三从”的主从复制环境。上面创建创建容器时使用的
--link参数用来配置容器在网络上的主机名(网络地址别名)。
配置好主从复制后,写数据的操作应该master上执行,而读数据的操作应该在slave上完成。为此,在Django项目中需要配置DATABASE_ROUTERS并通过自定义的主从复制路由类来实现读写分离操作,如下所示:
DATABASE_ROUTERS = [# 此处省略其他配置'common.routers.MasterSlaveRouter',]
class MasterSlaveRouter(object):"""主从复制路由"""@staticmethoddef db_for_read(model, **hints):"""Attempts to read auth models go to auth_db."""return random.choice(('slave1', 'slave2', 'slave3'))@staticmethoddef db_for_write(model, **hints):"""Attempts to write auth models go to auth_db."""return 'default'@staticmethoddef allow_relation(obj1, obj2, **hints):"""Allow relations if a model in the auth app is involved."""return None@staticmethoddef allow_migrate(db, app_label, model_name=None, **hints):"""Make sure the auth app only appears in the 'auth_db'database."""return True
上面的内容参考了Django官方文档的DATABASE_ROUTERS配置,对代码进行了适当的调整。
Docker
事实上,项目上线中最为麻烦的事情就是配置软件运行环境,环境的差异会给软件的安装和部署带来诸多的麻烦,而Docker正好可以解决这个问题。关于Docker在之前的文档中我们已经介绍过了,接下来我们对Docker的知识做一些必要的补充。
创建镜像文件。
将容器保存成镜像:
docker commit -m "..." -a "jackfrued" <container-name> jackfrued/<image-name>
使用Dockerfile构建镜像:
# 指定基础镜像文件FROM centos:latest# 指定维护者信息MAINTAINER jackfrued# 执行命令RUN yum -y install gccRUN cd ~RUN mkdir -p project/codeRUN mkdir -p project/logs# 拷贝文件COPY ...# 暴露端口EXPOSE ...# 在容器启动时执行命令CMD ~/init.sh
docker build -t jackfrued/<image-name> .
镜像的导入和导出。
docker save -o <file-name>.tar <image-name>:<version>docker load -i <file-name>.tar
推送到DockerHub服务器。
docker tag <image-name>:<version> jackfrued/<name>docker logindocker push jackfrued/<name>
容器之间的通信。
docker run --link <container-name>:<alias-name>
如果我们能够在Docker中完成项目的部署,并且将整个部署好的容器打包成镜像文件进行分发和安装,这样就可以解决项目在多个节点上进行部署时可能遇到的麻烦,而且整个部署可以在很短的时间内完成。
Supervisor
Supervisor是一个用Python写的进程管理工具,可以很方便的用来在类Unix系统下启动、重启(自动重启程序)和关闭进程,目前Supervisor暂时还没有提供对Python 3的支持,可以通过Python 2来安装和运行Supervisor,再通过Supervisor来管理Python 3的程序。
安装Supervisor。
pip install virtualenvvirtualenv -p /usr/bin/python venvsource venv/bin/activatepip install supervisor
查看Supervisor的配置文件。
vim /etc/supervisord.conf
; 此处省略上面的代码; The [include] section can just contain the "files" setting. This; setting can list multiple files (separated by whitespace or; newlines). It can also contain wildcards. The filenames are; interpreted as relative to this file. Included files *cannot*; include files themselves.[include]files = supervisord.d/*.ini
可以看出自定义的管理配置代码可以放在
/etc/supervisord.d目录中,并且文件名以ini作为后缀即可。编写自己的配置文件
fangtx.ini并放在/etc/supervisord.d目录中。[program:project]command=uwsgi --ini /root/project/conf/uwsgi.inistopsignal=QUITautostart=trueautorestart=trueredirect_stderr=true[program:celery]; Set full path to celery program if using virtualenvcommand=/root/project/venv/bin/python manage.py celery -A fangtx workeruser=rootnumprocs=1stdout_logfile=/var/log/supervisor/celery.logstderr_logfile=/var/log/supervisor/celery_error.logautostart=trueautorestart=truestartsecs=10; Need to wait for currently executing tasks to finish at shutdown.; Increase this if you have very long running tasks.;stopwaitsecs = 600; When resorting to send SIGKILL to the program to terminate it; send SIGKILL to its whole process group instead,; taking care of its children as well.killasgroup=true; Set Celery priority higher than default (999); so, if rabbitmq is supervised, it will start first.priority=1000
启动Supervisor。
supervisorctl -c /etc/supervisord.conf
其他服务
常用开源软件。
| 功能 | 开源方案 | | —————————- | ————————————- | | 版本控制工具 | Git、Mercurial、SVN | | 缺陷管理 | Redmine、Mantis | | 负载均衡 | Nginx、LVS、HAProxy | | 邮件服务 | Postfix、Sendmail | | HTTP服务 | Nginx、Apache | | 消息队列 | RabbitMQ、ZeroMQ、Redis | | 文件系统 | FastDFS | | 基于位置服务(LBS) | MongoDB、Redis | | 监控服务 | Nagios、Zabbix | | 关系型数据库 | MySQL、PostgreSQL | | 非关系型数据库 | MongoDB、Redis、Cassandra | | 搜索引擎 | ElasticSearch、Solr | | 缓存服务 | Mamcached、Redis |
常用云服务。
| 功能 | 可用的云服务 | | ——————— | ———————————————————- | | 团队协作工具 | Teambition、钉钉 | | 代码托管平台 | Github、Gitee、CODING | | 邮件服务 | SendCloud | | 云存储(CDN) | 七牛、OSS、LeanCloud、Bmob、又拍云、AWS | | 移动端推送 | 极光、友盟、百度 | | 即时通信 | 环信、融云 | | 短信服务 | 云片、极光、Luosimao、又拍云 | | 第三方登录 | 友盟、ShareSDK | | 网站监控和统计 | 阿里云监控、监控宝、百度云观测、小鸟云 |
