Java MySQL 连接
本章节我们为大家介绍 Java 如何使用 使用 JDBC 连接 MySQL 数据库。
Java 连接 MySQL 需要驱动包,最新版下载地址为:http://dev.mysql.com/downloads/connector/j/,解压后得到jar库文件,然后在对应的项目中导入该库文件。
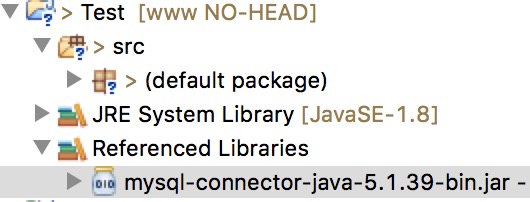
本实例使用的是 Eclipse,导入 jar 包:
MySQL 8.0 以上版本的数据库连接有所不同:
- 1、MySQL 8.0 以上版本驱动包版本
- 2、com.mysql.jdbc.Driver 更换为com.mysql.cj.jdbc.Driver。
- MySQL 8.0 以上版本不需要建立 SSL 连接的,需要显示关闭。
- 最后还需要设置 CST。
加载驱动与连接数据库方式如下:
- Class.forName("com.mysql.cj.jdbc.Driver");
- conn = DriverManager.getConnection("jdbc:mysql://localhost:3306/test_demo?useSSL=false&serverTimezone=UTC","root","password");
创建测试数据
接下来我们在 MySQL 中创建 javatest 数据库,并创建 websites 数据表,表结构如下:
CREATE TABLE `websites` (`id` int(11) NOT NULL AUTO_INCREMENT,`name` char(20) NOT NULL DEFAULT '' COMMENT '站点名称',`url` varchar(255) NOT NULL DEFAULT '',`alexa` int(11) NOT NULL DEFAULT '0' COMMENT 'Alexa 排名',`country` char(10) NOT NULL DEFAULT '' COMMENT '国家',PRIMARY KEY (`id`)) ENGINE=InnoDB AUTO_INCREMENT=10 DEFAULT CHARSET=utf8;
插入一些数据:
INSERT INTO `websites` VALUES ('1', 'Google', 'https://www.google.cm/', '1', 'USA'), ('2', '淘宝', 'https://www.baidu.com/', '13', 'CN'), ('3', '百度', 'http://www.weibo.com', '5892', ''), ('4', '微博', 'http://weibo.com/', '20', 'CN'), ('5', 'Facebook', 'https://www.facebook.com/', '3', 'USA');
连接数据库
以下实例使用了 JDBC 连接 MySQL 数据库,注意一些数据如用户名,密码需要根据你的开发环境来配置:
MySQLDemo.java 文件代码:
package com.java.test;import java.sql.*;public class MySQLDemo {// MySQL 8.0 以下版本 - JDBC 驱动名及数据库 URLstatic final String JDBC_DRIVER = "com.mysql.jdbc.Driver";static final String DB_URL = "jdbc:mysql://localhost:3306/javatest";// MySQL 8.0 以上版本 - JDBC 驱动名及数据库 URL//static final String JDBC_DRIVER = "com.mysql.cj.jdbc.Driver";//static final String DB_URL = "jdbc:mysql://localhost:3306/javatest?useSSL=false&serverTimezone=UTC";// 数据库的用户名与密码,需要根据自己的设置static final String USER = "root";static final String PASS = "123456";public static void main(String[] args) {Connection conn = null;Statement stmt = null;try{// 注册 JDBC 驱动Class.forName(JDBC_DRIVER);// 打开链接System.out.println("连接数据库...");conn = DriverManager.getConnection(DB_URL,USER,PASS);// 执行查询System.out.println(" 实例化Statement对象...");stmt = conn.createStatement();String sql;sql = "SELECT id, name, url FROM websites";ResultSet rs = stmt.executeQuery(sql);// 展开结果集数据库while(rs.next()){// 通过字段检索int id = rs.getInt("id");String name = rs.getString("name");String url = rs.getString("url");// 输出数据System.out.print("ID: " + id);System.out.print(", 站点名称: " + name);System.out.print(", 站点 URL: " + url);System.out.print("\n");}// 完成后关闭rs.close();stmt.close();conn.close();}catch(SQLException se){// 处理 JDBC 错误se.printStackTrace();}catch(Exception e){// 处理 Class.forName 错误e.printStackTrace();}finally{// 关闭资源try{if(stmt!=null) stmt.close();}catch(SQLException se2){}// 什么都不做try{if(conn!=null) conn.close();}catch(SQLException se){se.printStackTrace();}}System.out.println("Goodbye!");}}
以上实例执行输出结果如下:
连接数据库...实例化Statement对...ID: 1, 站点名称: Google, 站点 URL: https://www.google.com/ID: 2, 站点名称: 淘宝, 站点 URL: https://www.taobao.com/ID: 3, 站点名称: 百度, 站点 URL: https://www.baidu.com/ID: 4, 站点名称: 微博, 站点 URL: https://www.weibo.com/ID: 5, 站点名称: Facebook, 站点 URL: https://www.facebook.com/Goodbye!
DAO 模式
DAO (DataAccessobjects 数据存取对象)是指位于业务逻辑和持久化数据之间实现对持久化数据的访问。通俗来讲,就是将数据库操作都封装起来。
对外提供相应的接口 在面向对象设计过程中,有一些"套路”用于解决特定问题称为模式。 DAO 模式提供了访问关系型数据库系统所需操作的接口,将数据访问和业务逻辑分离对上层提供面向对象的数据访问接口。
从以上 DAO 模式使用可以看出,DAO 模式的优势就在于它实现了两次隔离。
1、隔离了数据访问代码和业务逻辑代码。业务逻辑代码直接调用DAO方法即可,完全感觉不到数据库表的存在。分工明确,数据访问层代码变化不影响业务逻辑代码,这符合单一职能原则,降低了藕合性,提高了可复用性。
2、隔离了不同数据库实现。采用面向接口编程,如果底层数据库变化,如由 MySQL 变成 Oracle 只要增加 DAO 接口的新实现类即可,原有 MySQ 实现不用修改。这符合 "开-闭" 原则。该原则降低了代码的藕合性,提高了代码扩展性和系统的可移植性。
一个典型的DAO 模式主要由以下几部分组成。
1、DAO接口: 把对数据库的所有操作定义成抽象方法,可以提供多种实现。
2、DAO 实现类: 针对不同数据库给出DAO接口定义方法的具体实现。
3、实体类:用于存放与传输对象数据。
4、数据库连接和关闭工具类: 避免了数据库连接和关闭代码的重复使用,方便修改。
DAO 接口
public interface PetDao {/*** 查询所有宠物*/List<Pet> findAllPets() throws Exception;}
DAO 实现类
public class PetDaoImpl extends BaseDao implements PetDao {/*** 查询所有宠物*/public List<Pet> findAllPets() throws Exception {Connection conn=BaseDao.getConnection();String sql="select * from pet";PreparedStatement stmt= conn.prepareStatement(sql);ResultSet rs= stmt.executeQuery();List<Pet> petList=new ArrayList<Pet>();while(rs.next()) {Pet pet=new Pet(rs.getInt("id"),rs.getInt("owner_id"),rs.getInt("store_id"),rs.getString("name"),rs.getString("type_name"),rs.getInt("health"),rs.getInt("love"),rs.getDate("birthday"));petList.add(pet);}BaseDao.closeAll(conn, stmt, rs);return petList;}}
宠物实体类(里面get/set方法就不列出了)
public class Pet {private Integer id;private Integer ownerId; //主人IDprivate Integer storeId; //商店IDprivate String name; //姓名private String typeName; //类型private int health; //健康值private int love; //爱心值private Date birthday; //生日}
连接数据库
public class BaseDao {private static String driver="com.mysql.jdbc.Driver";private static String url="jdbc:mysql://127.0.0.1:3306/epet";private static String user="root";private static String password="root";static {try {Class.forName(driver);} catch (ClassNotFoundException e) {e.printStackTrace();}}public static Connection getConnection() throws SQLException {return DriverManager.getConnection(url, user, password);}public static void closeAll(Connection conn,Statement stmt,ResultSet rs) throws SQLException {if(rs!=null) {rs.close();}if(stmt!=null) {stmt.close();}if(conn!=null) {conn.close();}}public int executeSQL(String preparedSql, Object[] param) throws ClassNotFoundException {Connection conn = null;PreparedStatement pstmt = null;/* 处理SQL,执行SQL */try {conn = getConnection(); // 得到数据库连接pstmt = conn.prepareStatement(preparedSql); // 得到PreparedStatement对象if (param != null) {for (int i = 0; i < param.length; i++) {pstmt.setObject(i + 1, param[i]); // 为预编译sql设置参数}}ResultSet num = pstmt.executeQuery(); // 执行SQL语句} catch (SQLException e) {e.printStackTrace(); // 处理SQLException异常} finally {try {BaseDao.closeAll(conn, pstmt, null);} catch (SQLException e) {e.printStackTrace();}}return 0;}}
MySQL 8.0 以上版本
驱动包版本 mysql-connector-java-8.0.12.jar。
数据库 URL 需要声明是否使用 SSL 安全验证及指定服务器上的时区:
static final String DB_URL = jdbc:mysql://localhost:3306/javatest?useSSL=false&serverTimezone=UTC;conn = DriverManager.getConnection(DB_URL,USER,PASS);
原本的驱动器是:
Class.forName("com.mysql.jdbc.Driver");
在 IDEA 里面提示是:Loading class com.mysql.jdbc.Driver'. This is deprecated. The new driver class iscom.mysql.cj.jdbc.Driver'. The driver is automatically registered via the SPI and manual loading of the driver class is generally unnecessary
意思是说原本的驱动器不赞成 或者 是废弃了,自动换成了新的驱动器 com.mysql.cj.jdbc.Driver
Class.forName("com.mysql.cj.jdbc.Driver");
运行程序时抛出异常
- Caused by: java.sql.SQLException: The server time zone value '�й���ʱ��' is unrecognized or represents more than one time zone. You must configure either the server or JDBC driver (via the serverTimezone configuration property) to use a more specifc time zone value if you want to utilize time zone support.
解决办法:
在
jdbcUrl=jdbc:mysql://localhost:3306/spring
后面加上:
jdbcUrl=jdbc:mysql://localhost:3306/spring?serverTimezone=UTC
但如果你的 jdbcUrl 类似下面:
jdbcUrl=jdbc:mysql://localhost:3306/spring?serverTimezone=UTC&characterEncoding=utf-8
就是有多个 params 的时候需要以 & 分开,但 & 要改为 & 如下:
jdbcUrl=jdbc:mysql://localhost:3306/spring?serverTimezone=UTC&characterEncoding=utf-8
使用 Maven 自动下载 mysql-connector-java
在 maven 工程下的 pom.xml 中加mysql-connector-java 的依赖,只需要填想要的版本号,就能自动下载对应的 jar 包,更加方便。
<dependency><groupId>mysql</groupId><artifactId>mysql-connector-java</artifactId><version>8.0.16</version></dependency>
